Native Screen to Web view
How we offered our native app screen experience to a new client with web views
We recently worked on a feature that involved integrating one of our native app screens with a new client’s native app. This was an architecturally interesting project and a great opportunity to think through how we design software.
Our native app originally included a “wallet” screen, which displayed details like a payment card, card balance, and transaction history. The idea was to integrate our wallet experience into another client’s native app, with their custom branding.
The approach we landed on was to convert our Wallet screen into a web view that would fetch all of the web pages necessary for the wallet experience. This would allow us to make it available to other clients; additionally, it had the advantage of easier releasing, as new code changes would only require a server deploy rather than an app store release.
How
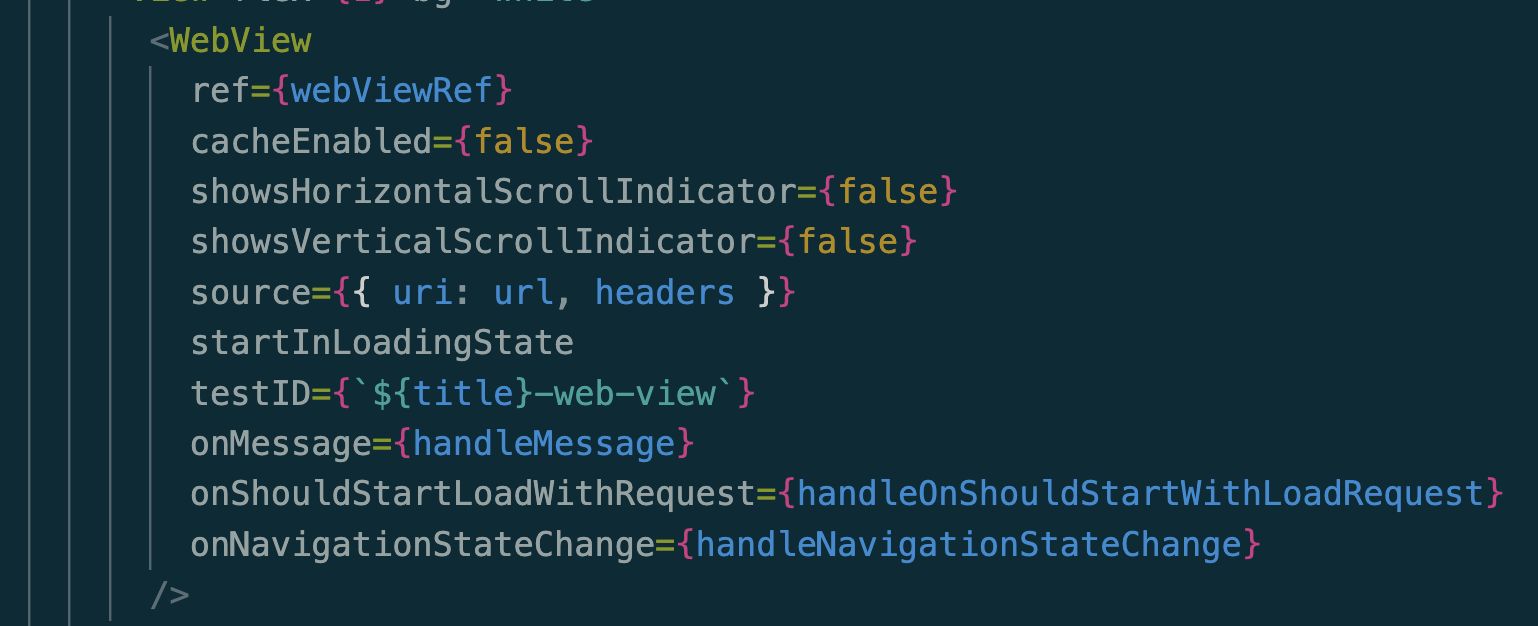
The first step was rebuilding our wallet screen’s native behavior into server side rendered web pages. On the app side, these are fetched and rendered in a web view. Below is an example with react native’s WebView component, which can easily be isolated from behavior that might overlap with the wallet, but doesn’t need to be shared (e.g. refresh token implementation, analytics tracking, and the like). Once this was complete, our wallet experience was available to any browser or web view. It can be accessed with a url and an authentication token (see the source prop below). This enables any client with these two pieces to integrate our wallet into their native app through their own web view implementation.

Authentication
In order to make our webview extendable to other clients, we needed a way to authenticate for that page specifically. In our original native context, the user is already authenticated when they land on this screen. We now want to authenticate the user like we would with a web app. Whether this page is being served to an external client or not, the user needs an access token at the time they attempt to view the wallet page. This is used to hit a login route that will redirect them to our wallet page on a successful login. Our login path will use the token to authenticate and then set a cookie to access all relevant wallet pages. We provide this token to the user when they authenticate with the native app, and for external clients we expose an endpoint to acquire this token. See below:
Our native app:
- User authenticates through the app and gets an access token
- Access token is used to login to our wallet pages
External client using the web view:
- User authenticates with external client
- External client uses machine token to access our endpoint to get a wallet token for that user
- Access token is used to login to our wallet pages
We also provide a refresh token with the access token. The client can leverage the refresh tokens to implement their own refresh token behavior to not disrupt sessions when the token expires.
Customization
Since the goal was to provide the wallet experience with a client’s specific branding, we needed to be able to customize things like: images, fonts, icons, and text. To accomplish this we leverged a json document, config.json, (stored in the database) and S3 to store client specific assets. A client configuration class is the interface for anything having to do with customizations. For example, to fetch our icon library we can do the following:
ClientConfiguration.asset_url(
   "path",
   "to",
   "custom",
   "icon",
   "lib",
)
Similarly, we can get client specific wording with:
ClientConfiguration.dig(
   "path",
   "to",
   "some",
   "custom",
   "text"
)
This allowed us to keep our code client agnostic. All that’s needed to onboard a new client is a configuration record (config.json) and an S3 bucket with that client’s assets (i.e. stylesheets, images, fonts, and icons). Our server code doesn’t have to worry about which client it’s serving the wallet experience to, as it’s solely a data difference and not a code difference.
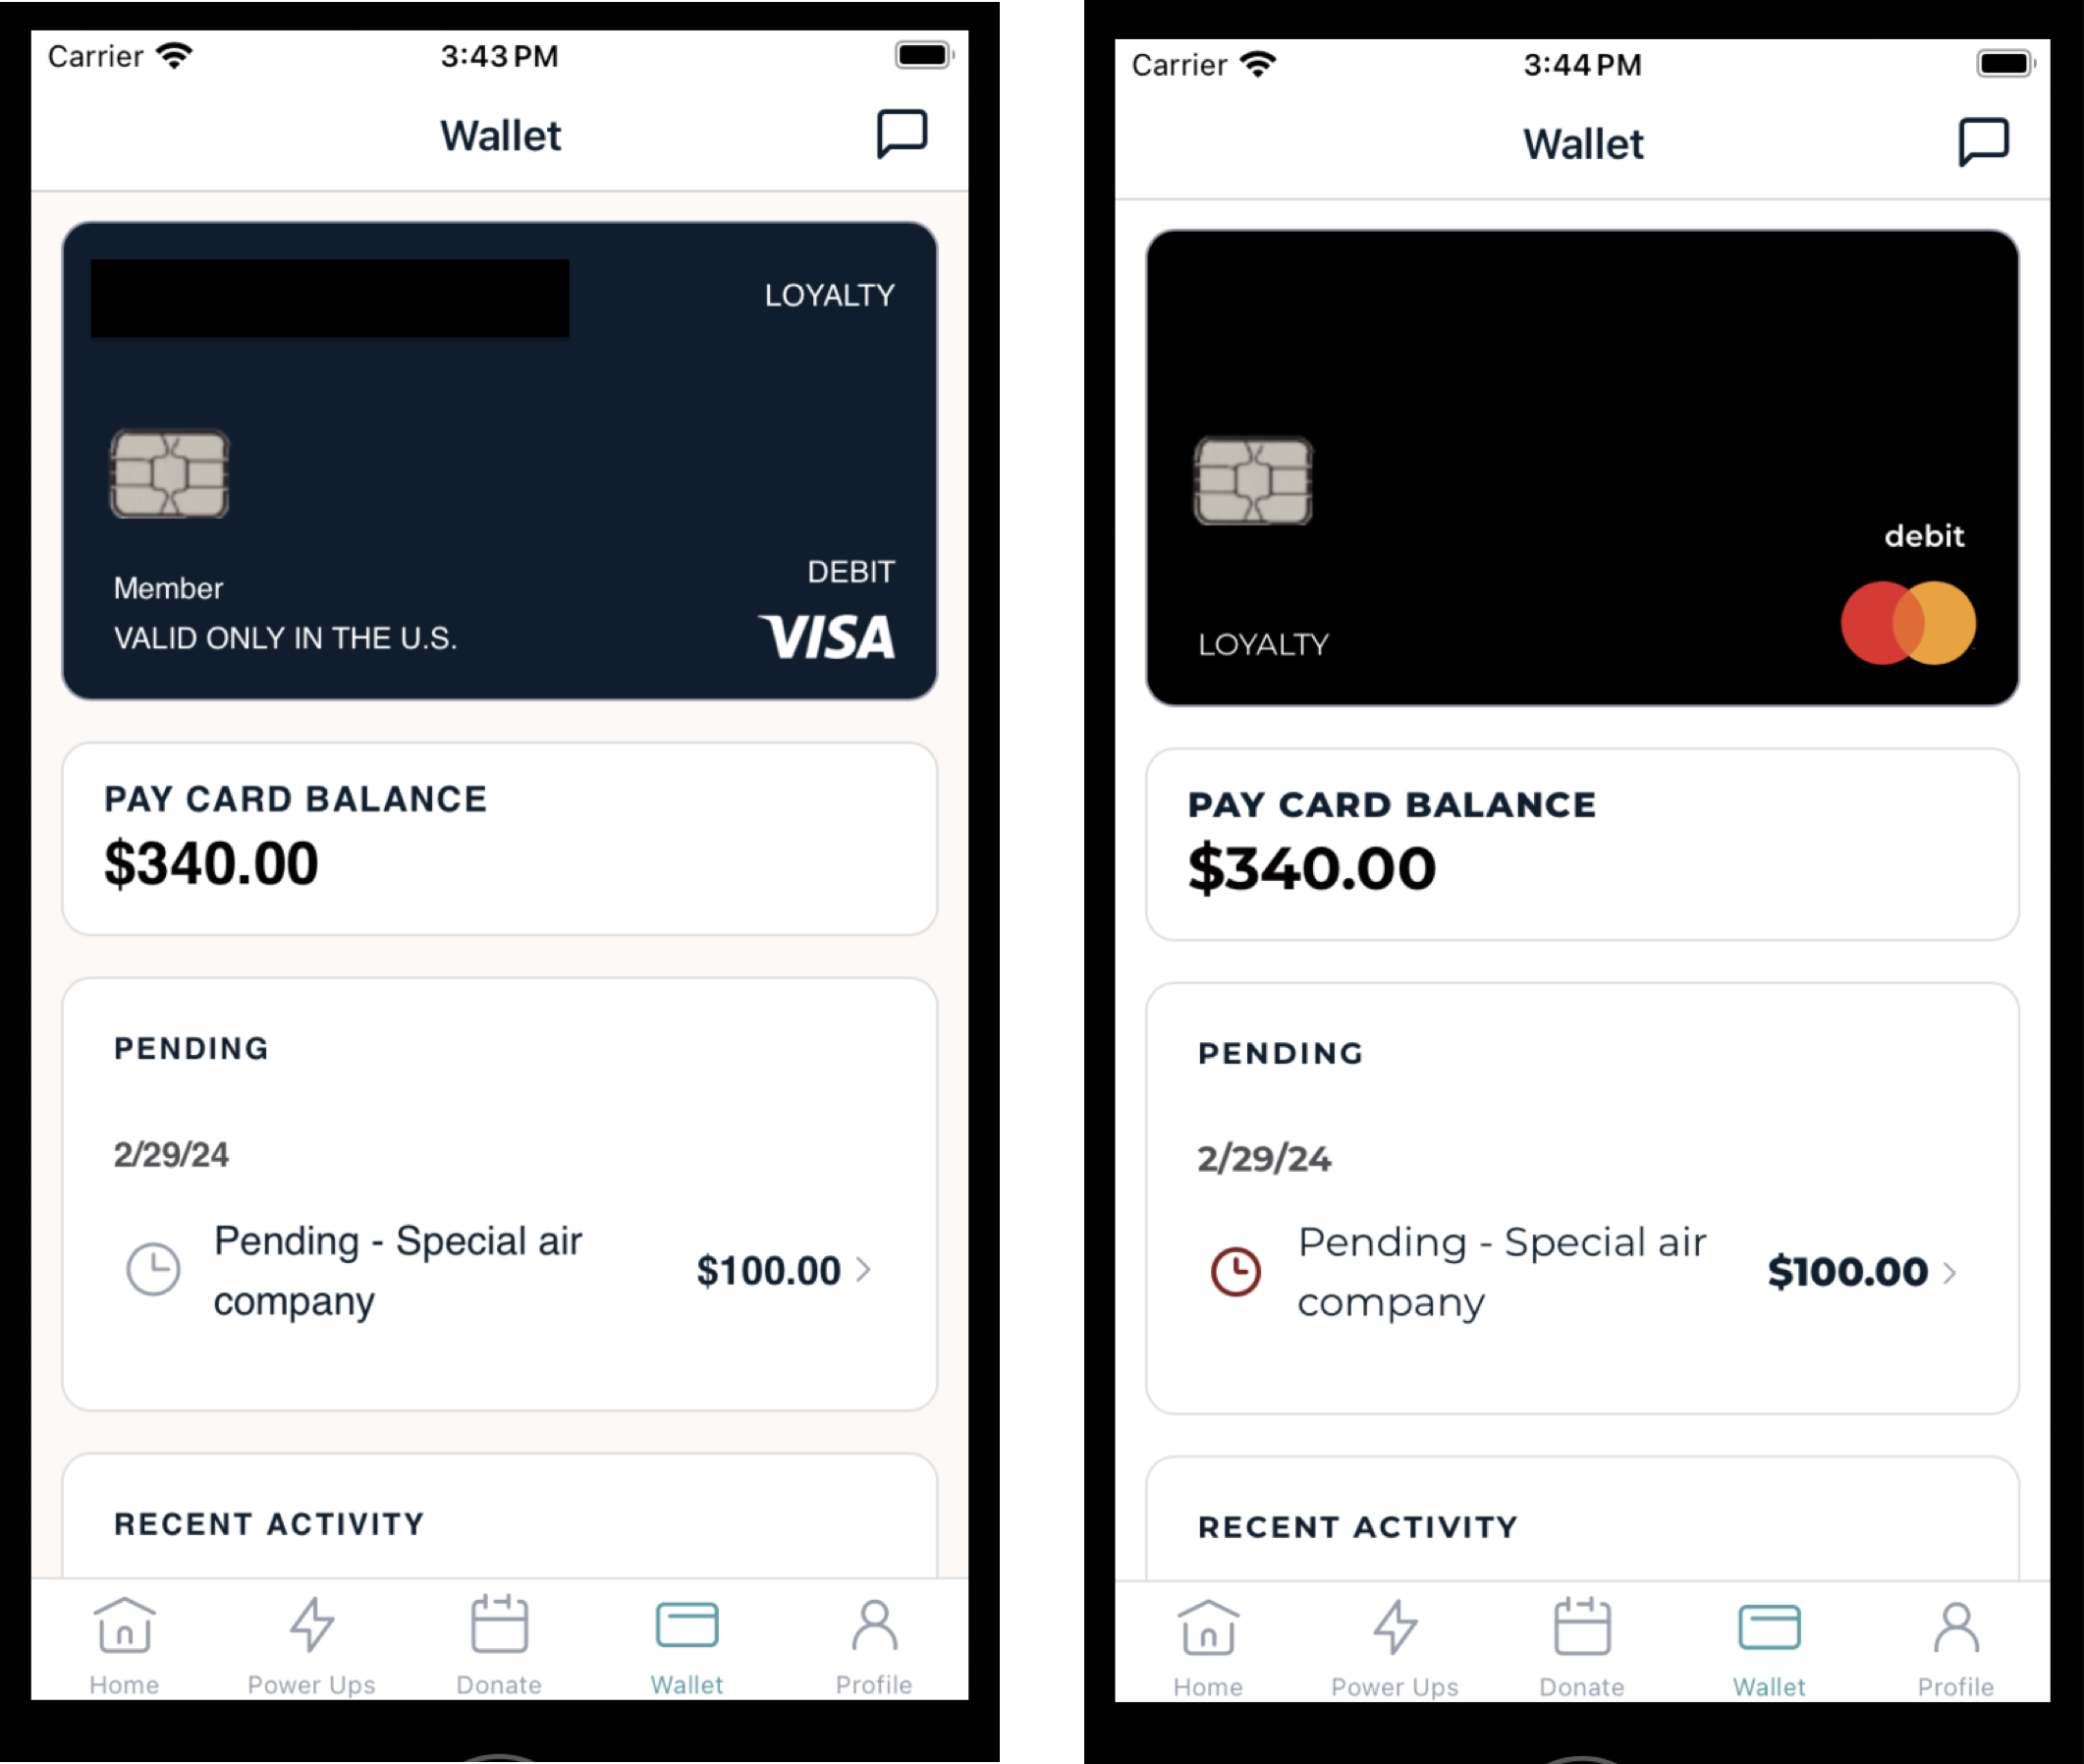
The end result
The server can render the same view with different branding:

Conclusion
Moving our wallet behavior to a web view enabled us to:
- make changes more easily and frequently, as it only requires a server deploy rather than an app store release
- allow clients to integrate our wallet experience, taylored to their branding, into their native apps.
